Whether you’re building a new home or remodeling your house, installing recessed lighting is likely one of the more challenging tasks. The good news is, except for the occasional concrete or ornate plasterwork ceiling, most ceilings are suitable for installing recessed lighting. All it takes is a few handyman tools, some knowledge and you are good to go.
Can You Really DIY?
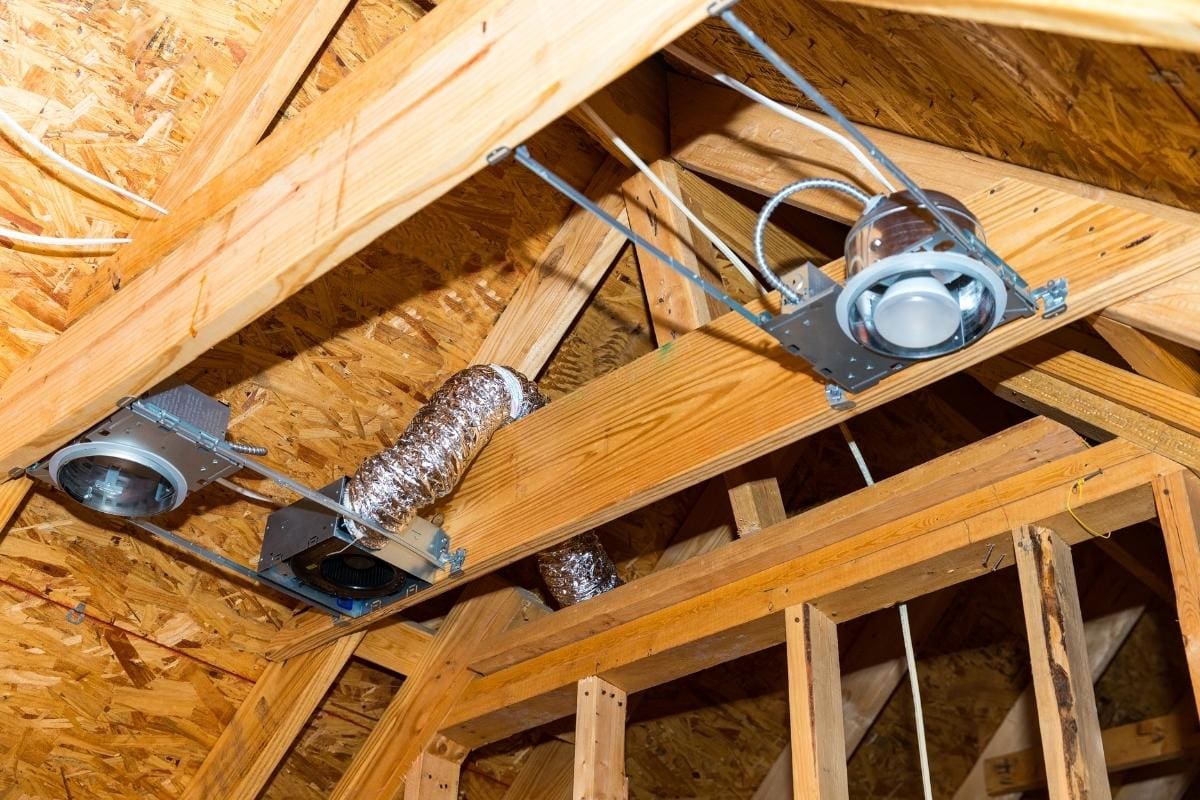
For a brand new construction, installing recessed lighting isn’t much of an issue. You just need to locate the ceiling joists, screw or nail in the brackets where you would like to position your light fixtures and affix the physical metal housings to the bracket. Place the drywall (with the openings for the housings cut out) over and viola, it’s done. The same applies if you’re able to access the ceiling via the attic.
Installing recessed lighting is slightly more complicated if you’re remodeling your house. Luckily, manufacturers have come up with retrofit kits that come complete with detailed recessed lighting installation instructions and even stenciling templates for outlining and cutting out drywall openings. These products tend to be insulation contact (“IC”) proof and you can install them from the bottom of the ceiling without worrying if there is insulation above. If you choose to use non IC rated fixtures in this case, you need to make sure there is at least 3 inches away from the insulation wiring.
An area where you probably need professional help is the wiring. If there is no available power source nearby, engaging a certified electrician to set up a wire connection to the fixture can help you save loads of time and hassle. But if there is already a ceiling box around the installation area and your local codes permit, you can still DIY by detaching the wires from it and reconnecting them to the retrofit.
Things You Need
- Recessed Lights Fixtures
- Stud Finder
- Drill
- Drywall saw
- Utility knife
- Wire connectors
- Wire strippers
- Pliers
- Screwdrivers
Step by Step Recessed Lighting Installation Instructions
Cut the Opening
Turn off the power and use the stud finder to locate the ceiling joists. With the stenciling template provided in your retrofit kit, outline the opening in between the joists. Use the utility knife to mark out the line and once that’s done, cut the opening with a drywall saw. Make sure the hole is just right to hold the fixture’s housing.
Run the Wiring
Draw the cable from the ceiling box or other applicable power source to the opening and make sure to have excess inches of cable available for wiring.
Connect to the Fixture’s Junction Box
Insert the wire into the junction box and hold it with a clamp. Strip off the wire’s insulation and connect it based on the matching wire colors. The fixture’s black wire has to go with the black house wiring. The white goes with the white house wire, while the green or bare ground fixture wire matches with the ground wire. You can use wire connectors if you like. Once that’s done, close up the junction box.
Install the Housing
Insert the junction box into the hole and position the housing inside the opening. Make sure it’s tight. Use a screwdriver to push in the mounting clips until they secure the fixture against the ceiling.
Affix the Trim
Position the trim. Depending on the design you’ve selected, just follow the manufacturer’s instructions and you will be able to get this done in a breeze. Attach the light bulbs provided and turn on the power. Viola, your recessed lighting’s up!
Some Notes & Precautions
- It’s important to check if your local regulations allow you to do your own wiring. Some local codes prohibit this or require any do-it-yourself wiring to be certified by a licensed electrician. Do ensure that you comply with this.
- Installing recessed lighting fixtures that are non IC in an insulated ceiling can be dangerous as the heat generated may result in a fire. If you’ve chosen to do so, make sure your non IC fixture is at least 3 inches away from the insulation or any combustible substances.
- Use only bulbs of the right voltage. In the event of converting your existing recessed lights to a lower voltage, make sure you select a retrofit kit with pre-installed transformers.
- All power should be shut off while installing recessed lighting fixtures.

